Casting Stones in Place

Casting Stones in Place

How to Cast Gem Stones in Place Tutorial 

These rings were cast and polished during  this demonstration on how to cast stones in place.

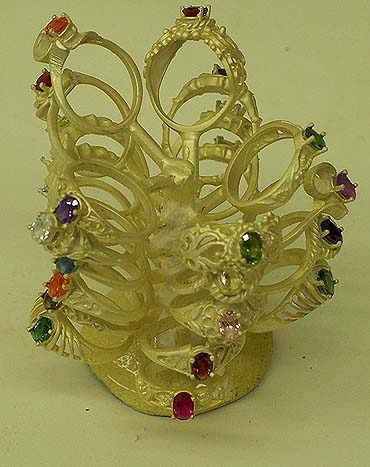
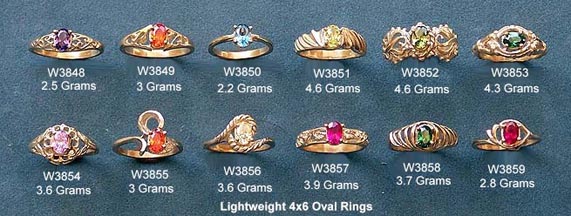
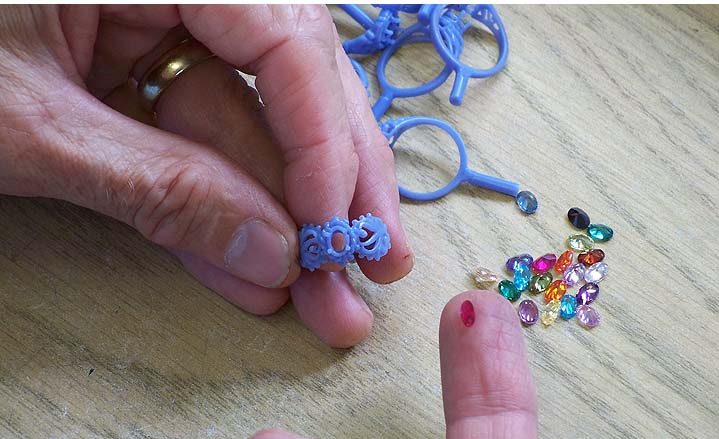
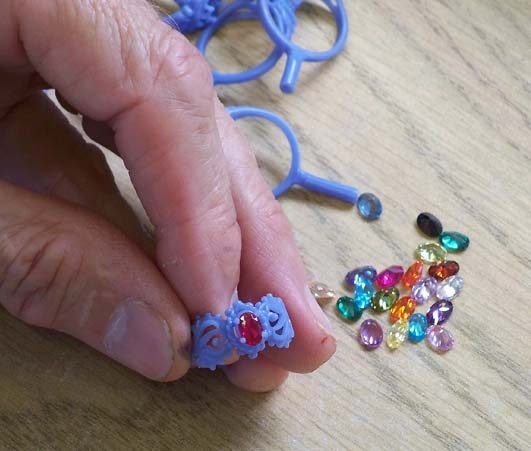
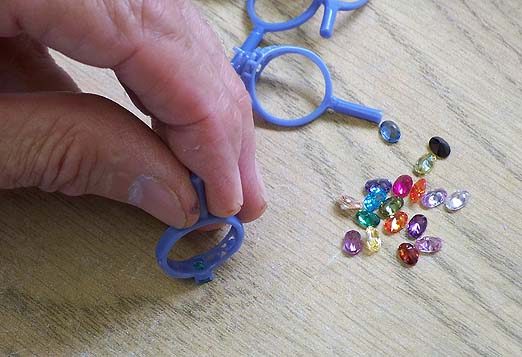
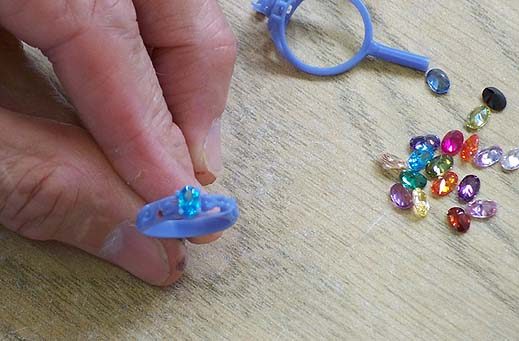
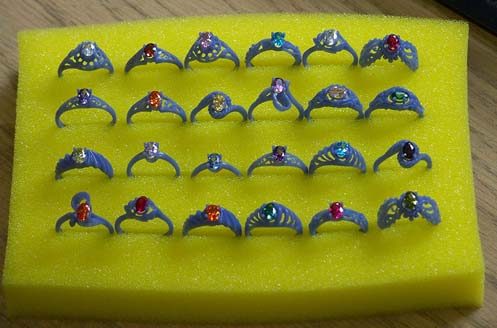
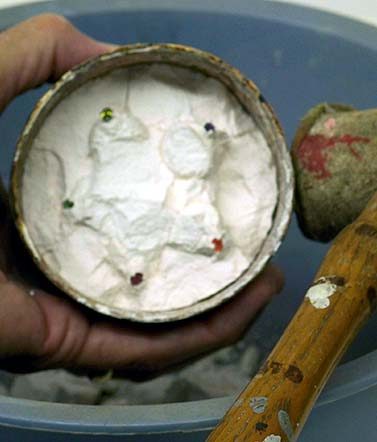
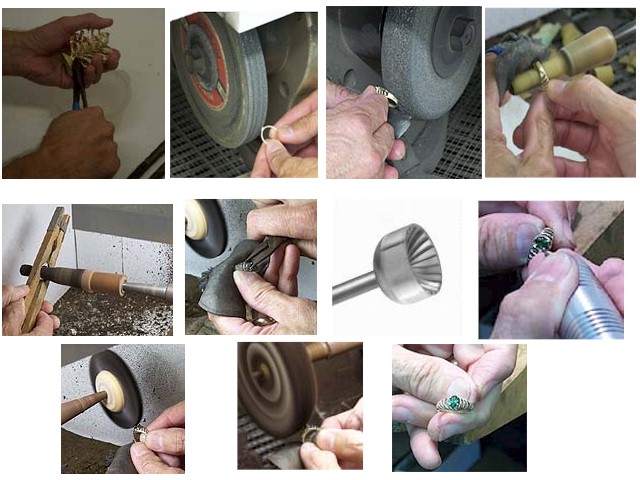
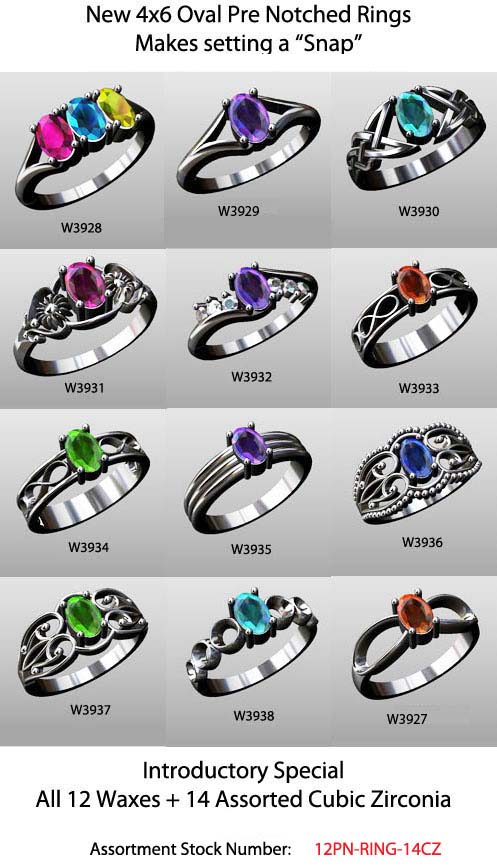
We started  with 2 each our 12 piece assortment of lightweight 4×6 ladies oval rings pictured above. These waxes have “prenotched” heads to hold the stones. These prenotched heads make it easy to cast stones in place.  The “prenotched” means that the seats are already cut to hold the stones. 

These stones are “Cubic Zirconia”. There are many stones that can be cast in place including Diamond, Ruby, Sapphire, Garnet, Cubic Zirconia and Various lab grown colored gemstones.

GEMSTONES NOT RECOMMENDED ARE: Emerald, Opal, Jade, Amethyst, Topaz, Peridot, Coral, Aquamarine, Tourmaline, Topaz, Pearl, Lapis Lazuli, Turquoise , Onyx and other softer gemstones as they gemstones may burn, crack or discolor when exposed to high heat.

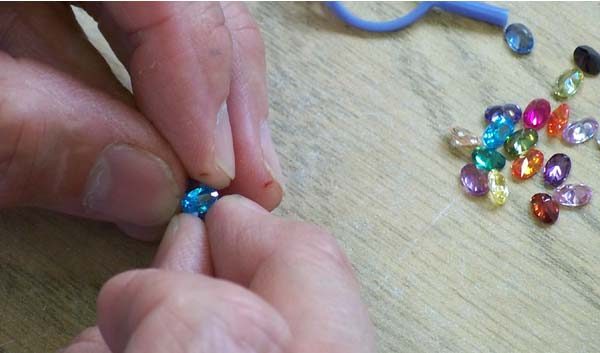
GEMSTONES SELECTED FOR CASTING IN PLACE should be high quality, dimensionally accurate, free of flaws and inclusions that can turn milky, frosty or crack when heated.

We suggest practicing with inexpensive stones such as Cubic Zirconia and becoming totally familiar with the process before risking more valuable stones. The process can damage your stones if not done properly.

Casting stones in place can save you time and money. Manufacturers have been using this process for many years.

Under normal stone setting procedure, small “heart” burrs aka 45 degree bearing burrs are used to cut the seats into the prongs. The stones are placed inside the prongs and then gently tightened around the stones using small pliers.

The wax rings we are using already have the seats cut in place, so 95% of the setting work is done.

First we laid out the waxes and stones and carefully placed  them into the prongs

Make sure the stone is setting in the “notches”

You can also lay the stone on the table and gently press the stone into the prongs.

Once the stone is sitting in the notches, gently press the prongs against the stone, this tightens the prongs and helps form the seat to hold the stone. Be gentle but firm.

In a few minutes all the stones are in place and ready to cast

Now we follow normal casting procedures, sprue and build a tree on a sprue base

There are investments available made especially for casting stones in place that contain materials which is supposed to help protect the stones. It is more expensive. We have never used it and have had very good succes using our regular casting investment.

After the investment sets up in about 60 minutes we are ready to burnout.

We  Burnout at 1100 degrees instead of 1300 degrees. The reason we burn out at a slightly lower temperature is because some stones are “heat treated” to enhance their color. The higher the burnout temperature, the more the possibility you can change the color, so burnout as low as possible. 1100 degrees seems to work fine for most stones.  We had a couple of the stones change color during this session,  More on that later.

You may need to extend your burnout time a little bit longer because you are burning out at a lower temperature.  A good friend that does a lot of casting diamonds in place,   burns out out at 900 degrees for 12 hoursHe claims 900 is better than 1100 degrees  and reduces the risk of “burning” or “fogging” diamonds.  He says in the past year he has 100% success rate casting diamonds in place when the burnout is 900 degrees.

 Experiment and stick with the results that works best for you.  Again, we suggest burning out as low as possible, but make sure the flask is completely burned out before casting.

 Burnout is complete when the investment is chalky white and the sprue holes are glowing orange. If there is any grey or dark residue in the sprue holes, extend your burnout time until the investment is chalky white.  Don’t cast until completely burned out. It can cause porosity and incomplete castings. 

Cast as you normally do, flask temp should be between 800 – 900 degrees when casting takes place. 

Let the flask “bench cool” for a minimum of 1 hour before devesting. Do not quench the flask when it is hot,  the sudden temperature change  will fracture the stones.

Wait a minimum of one hour.

This flask took 1 1/2 hours before it could be handled

We use a rawhide mallet or rubber mallet and tap on the flask until the investment begins breaking away.

Keep Tapping until the casting breaks loose.

Use a dental tool or pick  to help remove the investment.

Do not use a bead blaster or sand blaster to clean the casting, it can pit the stones. Sonic cleaners work well.

Into the sonic cleaner for a bath, if you don’t have a sonic cleaner, scrub with a tooth brush. (sonic cleaner is easier)

This casting did not need pickling, however You can pickle castings to remove oxides if necessary,  it will not hurt the stones.

Now your ready to polish your new jewelry.

For those not familiar with stone setting. The above “cup” bur fits into your flex shaft and is used to shape the top of the prong. They are very simple to use, the cup is placed on top of the prong and you rotate the cup over the top of the prong.  It makes the tops of  all 4 prongs exactly the same size and shape. We used a 1.6mm cup bur for this demonstration.  They are available at your local jewelry supply store or lapidary store.

A couple of notes. 

The “mini Swiss” CZ  is a beautiful blue color. When we cast it in place it turned into an awesome looking deep emerald color.

The “Tanzanite” CZ is also a gorgeous color, It turned into “Smokey Topaz”. It looks great but isn’t “tanzanite” color anymore.

One customer informed me that the Black CZ’s changed colors on him, but he burned out at 1300 degrees instead of the 1100 degrees we recommended.  We have not had his problem with the black cz’s at 1100 degree burnout temperature. Just a heads up to be aware the black may change color at higher burnout temps. 

Another suggestion would be to burn out at 900 degrees to help keep colors intact. We also suggest burning out at 900 degrees when casting diamonds in place to help reduce the chance of “fogging” or “burning” the diamonds.

We highly suggest “easing” into this process. Don’t load up a flask with a lot of stones your first time around. Practice and experiment until you feel comfortable using this process.  There are a few more tips at the bottom of the page.

We will be glad to answer any questions you may have, just email [email protected]  and we will try and point you in the right direction.

If you would like to try casting stones in place, these lightweight rings and pendants are some of our most popular designs and with the pre notched prongs, it makes setting a “snap”.

Click on the images to Order


12 Rings and 12 4x6 Assorted CZ's $39.95
12 Pendant Wax Patterns and 12 Assorted CZ's $39.95
12 Wax Patterns and 14 4x6 Assorted CZ's $41.95
Shopping Cart